
2025 was off to a slow start. Not only was life just rough the begin the year with but I also had to wait two and a half weeks for my new bullet journal to come in! By the time I got done with the initial set up (which I abbreviated) it was the third week in January! Instead of doing all my normal spreads, I decided to just do a basic cover page and my favorite 2-Page calendar spread. I thought we’d go step by step through how I set up my calendar spread!
This blog post contains affiliate links to products. As an Amazon Associate, I earn from qualifying purchases. All of the products I share have either been items I have purchased myself and love, or items that come highly recommended and I would purchase in the future.
January Cover Page
before we get to my 2-page calendar spread, I thought we’d take a quick look at my January cover page. Last year I started to put this “chapter one loading” screen on the page to the left of January cover and absolutely loved it. I’m a reader so I like how this brings my other hobby into my bullet journaling. I kept my January cover super simple with some fancy handwriting and some fun washi tape I got from a fun Etsy Shop. I’m slightly disappointed I didn’t get to use the washi tape more because it is gorgeous. Maybe next year.

2-Page Calendar Spread
Now let’s get to the goods, my favorite 2-page calendar spread. I have been doing this spread for the last year or so and have absolutely loved how simple it is to set up and how functional it is. Honestly, what’s the point of having a spread in your journal if it’s not functional? Let’s go through the step by step process.
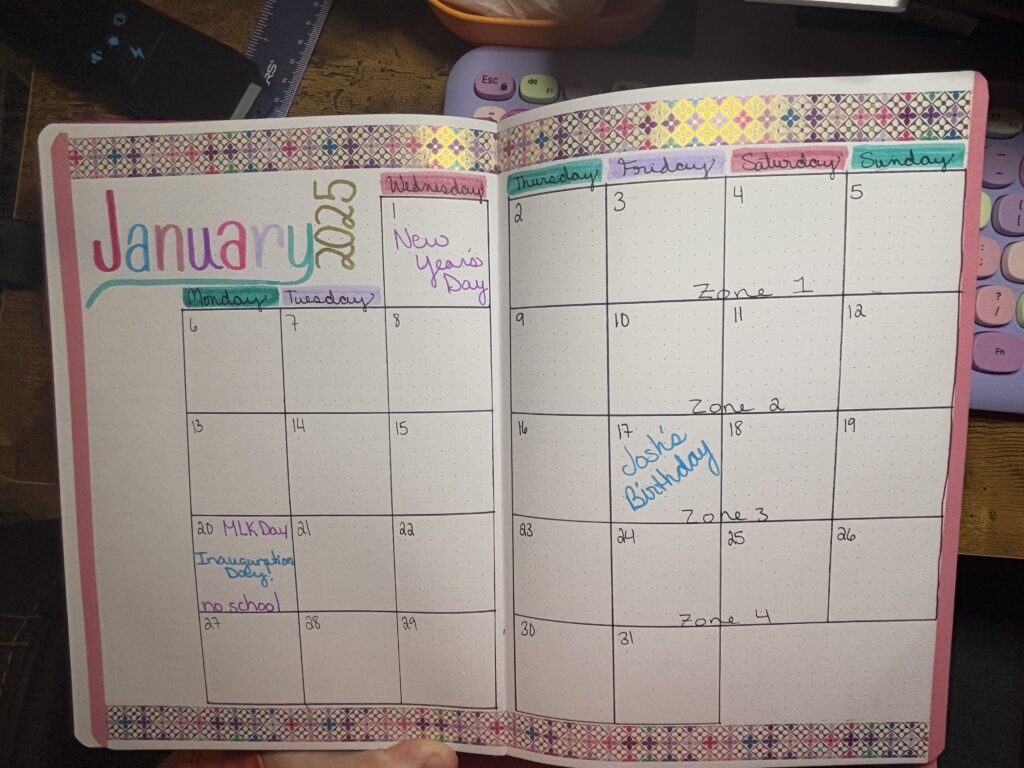
- The first thing to do is measure your journal. I use a B5 so when I measure my journal its a total of 16cm.
- The next step is to decide which side of your 2-page spread you want 4 days of the week and which side you want 3 days of the week. I like to put 3 days of the week on the left hand side of my journal and 4 days of the week on the right hand side of my journal.
- Since 4 days at the most will fit on one side of the journal, I take the total width of my page (16cm) and divide it by the 4 days since I’ll have 4 boxes, one for each day. Each box for each day of the week will be 4cm whether it’s on the right hand side or the left hand side.
- Next, I decide how far down I want the last week of the month to be on the page (sometimes the very bottom, something directly above a line of washi tape on the bottom). Once I’ve decided that, I use my ruler and start marking every 4cm from the bottom and 4cm across to make my calendar grid.
- Once my grid is completed, I add the numbers for the dates on each of the squares. I also add the day of the week at the top of the calendar. You can do this in colored ink OR you can do my favorite, highlight then use black ink to write over top of the highlight. This technique helps prevent your black ink from smearing.
- Now that your calendar is actually constructed, you can now add in things happening on the days of the month and well as decorating outside of the calendar. Different things to decorate with include washi tape, quotes, stickers, to-do lists, important dates, doodles, etc. Make it your own!
Items Used
- B5 Dot Grid Notebook: https://amzn.to/4apFYYz
- SAKURA Pigma Micron Fineliner Pens – https://amzn.to/40imssd
- Tombow Dual Brush Pen – https://amzn.to/40jxf5G
- Patterned Washi Tape: https://www.etsy.com/shop/BellasBeadHabit?ref=l2-about-shopname§ion_id=10869781
I hope this step-by-step guide helps you create your own 2-page calendar spread in your own journal! I always love the way it looks and how much room there is to work with! I hope you enjoy it as much as I do!
One thought on “How to Set Up a 2-Page Calendar Spread”